UNDERSTANDING THE FEATURES OF YOUR VEHICLE 93
Guide
side bows down into bracket on door rails.
Make sure door rail
Sunrider pins engage into bracket on
side bows (Unlimited Models
Only).
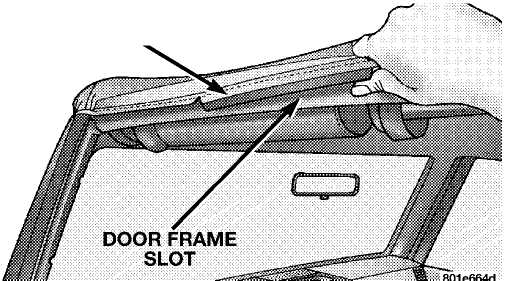
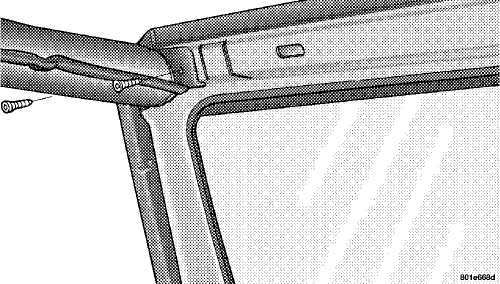
Grasp
the drip rail retainer and untuck them from the
door frame.

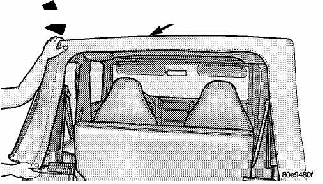
8. Move to the rear of the vehicle and gently pull the sail panels over the 3 bow. Let them hang down over the sport bar.

NOTE: Do not tuck the drip rails into the door frame at this time.
94 UNDERSTANDING THE FEATURES OF YOUR VEHICLE
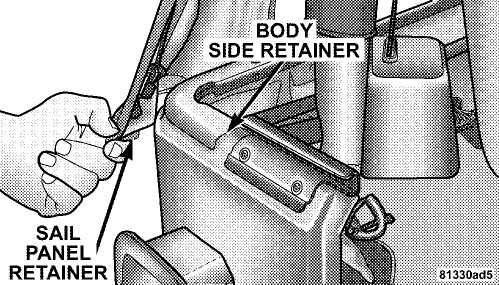
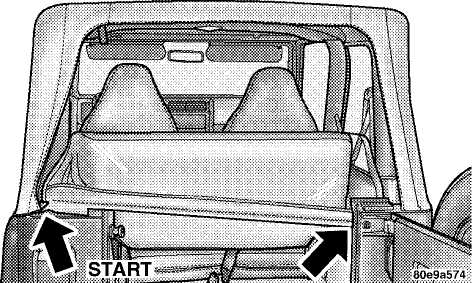
9. Tuck the sail panel retainer into the bodyside retainer. Begin working from the rear tailgate opening and work to the corner.
 PUSH
PUSH
DOWN Mg ^3 BOW
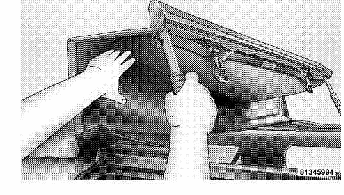
NOTE: This may be difficult to do the first time. If difficulty is experienced with fabric tension, place your hand on top of the 3 bow and push down to help tuck in the sail panels.
UNDERSTANDING THE FEATURES OF YOUR VEHICLE 95
10. To install the quarter windows, affix the rear corner of the window temporarily. Now, zip the zipper only about 1 inch (2.5 cm). At this time it is necessary to tuck in the door frame retainer.
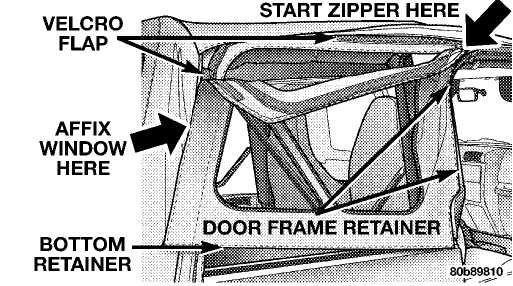
11. After the door frame retainer has been completely tucked in, finish zipping in the window. Then affix the Velcro® flaps around the window.
t j
96 UNDERSTANDING THE FEATURES OF YOUR VEHICLE
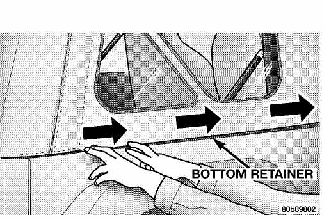 12.
Tuck the bottom retainers on the quarter
window into the bodyside retainer,
beginning from the rear and working
to the front of the vehicle. Repeat this step for the other
side.
12.
Tuck the bottom retainers on the quarter
window into the bodyside retainer,
beginning from the rear and working
to the front of the vehicle. Repeat this step for the other
side.
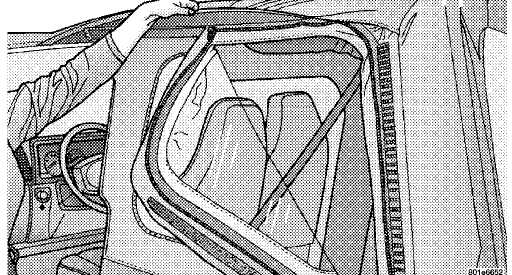
13. Zip in rear window beginning from the left using both zipper ends. Leave one zipper end at the start.
UNDERSTANDING THE FEATURES OF YOUR VEHICLE 97
 14.
To assist in getting the zipper started, lay the
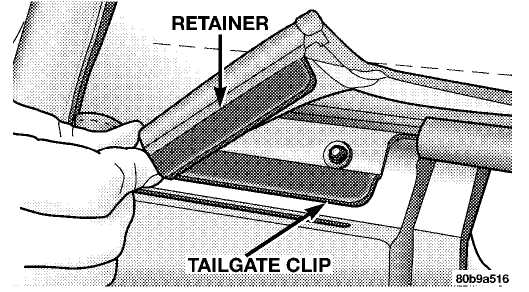
bar on 15. Tuck the retainer bar into
the tailgate clip, the inside of the wheel
wells and uninstall half of the D-pillar
retainer from U-rail to expose zipper ends.
14.
To assist in getting the zipper started, lay the
bar on 15. Tuck the retainer bar into
the tailgate clip, the inside of the wheel
wells and uninstall half of the D-pillar
retainer from U-rail to expose zipper ends.
98 UNDERSTANDING THE FEATURES OF YOUR VEHICLE
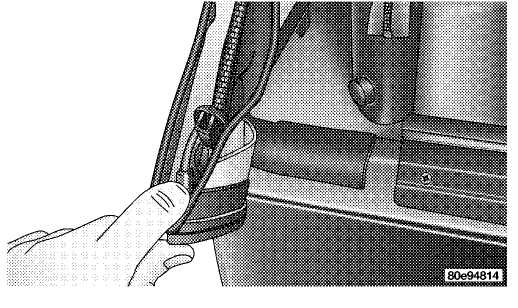
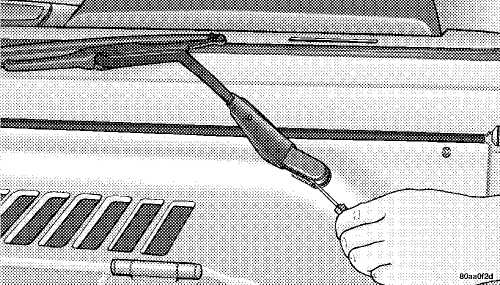
16. Tuck
in the solid plastic retainers on each side of the 17.
Tuck in drip rail retainers into the door frame
slots,
tailgate under the tailgate clip. DRIP
RAIL
RETAINER
UNDERSTANDING THE FEATURES OF YOUR VEHICLE 99
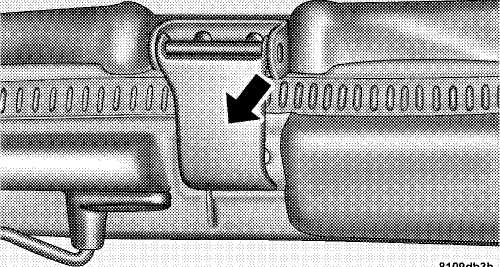
18. Close the header latches and return the sun visor to it’s original position.
SUNRIDER™ — IF EQUIPPED (UNLIMITED MODELS ONLY)
To Raise
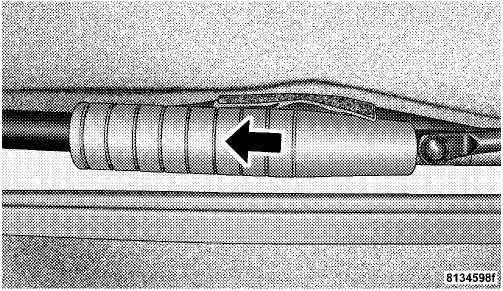
1. Grasp the drip rail retainers and untuck both of them from the door frame slot. Repeat this on the other side.
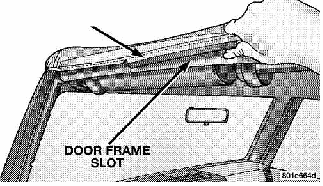 DRIP
RAIL RETAINER
DRIP
RAIL RETAINER
 UNDERSTANDING
THE FEATURES OF YOUR VEHICLE ■
UNDERSTANDING
THE FEATURES OF YOUR VEHICLE ■
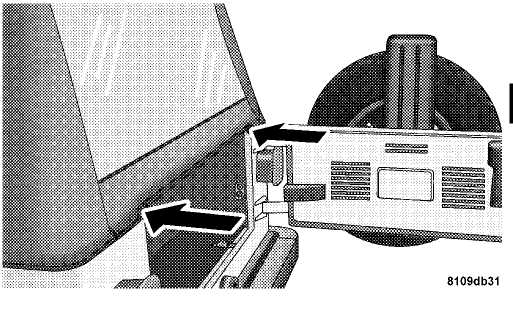
Unclip and move the sun visors to the side.
Release
the header latches, and slide the plastic sleeves
forward.
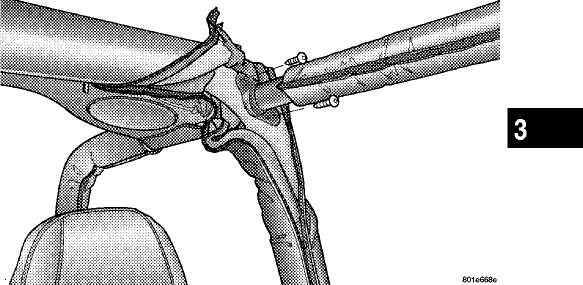
4. Grasp the header and lift the top back. Make sure the material is folded back as shown. Secure latches to plastic retainer on header. Locate strap to secure the header to the sport bar. Wrap strap around sport bar and hook to header and tighten.
5. Attach and reposition sunvisors. To Lower
Remove strap from header and sport bar.
Release header latches from header retainer.
Unclip and move the sun visors to the side.
Grasp
the front header and pull to the front of the
vehicle.
Slide plastic sleeve rearward over Sunrider™ link.
UNDERSTANDING THE FEATURES OF YOUR VEHICLE 101
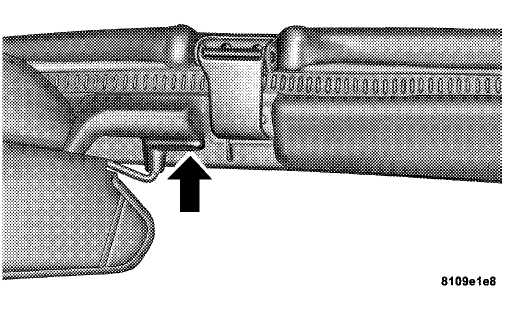
Tuck drip rail retainers into the door frame slots.
Close the
header latches, and return sun visors to their
original
position.
DOOR FRAME
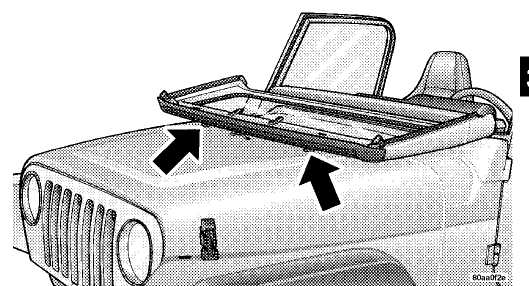
2. Fold the door frames and store the knobs and door frames outside of the vehicle. Repeat this step for the other side.
WARNING!
WARNING!
Do not drive your vehicle on-pavement with the door frame removed or the windshield down as you lose the protection these structural elements can provide. These two procedures are furnished for use during off-road operation only.
Use both hands to remove the door frames. The door frames will fold and could cause injury if both hands are not used.
Never store the door frames in your vehicle. In an event of an accident, a loose door frame many cause personal injury. If removed, always store the door frames outside of the vehicle.
Door Frame Removal
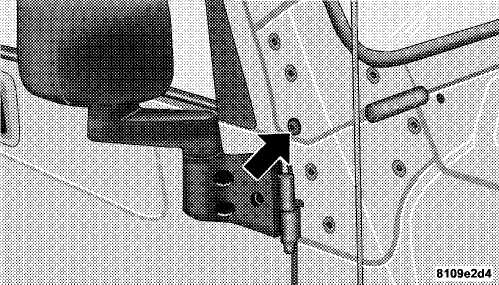
1. Unscrew and remove the door frame attachment knobs. Place one hand in the upper rear and one hand on the upper front of the door frame. Pull the frame towards you with your rearward hand to remove the frame from the vehicle.
Door Frame Installation
1. Set the door frame pin into the hole on top of the body side, just behind the door opening.
102 UNDERSTANDING THE FEATURES OF YOUR VEHICLE
2. Insert the top front of the door frame into the opening at the top corner of the door opening. Push the top rear of the door frame to the side bar.

3. Slide door frame forward until the pin holes in the top line up with the holes in the side bar. Screw in the knobs and tighten, beginning with the front knob. Repeat procedures on the other side.

FOLDING WINDSHIELD
The fold down windshield and removable side bars on your vehicle are structural elements that can provide some protection in some accidents. The windshield also provides some protection against weather, road debris and intrusion of small branches and other objects.
Do not drive your vehicle on-road with the windshield down and the side bars removed as you lose the protection these structural elements can provide.
UNDERSTANDING THE FEATURES OF YOUR VEHICLE 103
NOTE: Before lowering windshield, disconnect the electrical connector for the inside Compass/Temperature mirror (if equipped).
If required for certain off-road uses, the side bars can be removed and the windshield folded down. However, the protection afforded by these features is then lost. If you remove the side bars and fold down the windshield, drive slowly and cautiously. It is recommended that the speed of the vehicle be limited to 10 mph (16 km/h), with low range operation preferred, if you are driving off-road with the windshield folded down.
Raise the windshield and reinstall the side bars as soon as the task that required their removal is completed and before you return to on-road driving. Both you and your passenger should wear seat belts at all times, on-road and off-road, regardless of whether the windshield is raised or folded down.
Outside rear view mirrors are mounted on the doors. If you choose to remove the doors, see your authorized dealer for a replacement cowl-mounted outside mirror. Federal law requires outside mirrors on vehicles for on-road use.
NOTE: If the doors are removed, the courtesy lights will remain on. To turn these lights off, remove fuse #4 in the fuse panel. Refer to "Fuse Panel" in Section 7 of this manual.
104 UNDERSTANDING THE FEATURES OF YOUR VEHICLE
WARNING!
 Carefully
follow these warnings to help protect against personal injury:
Carefully
follow these warnings to help protect against personal injury:
Do not
drive your vehicle on-road with the wind
shield down.
Do not
drive your vehicle unless the windshield is
securely fastened,
either up or down.
Eye
protection, such as goggles, should be worn at
all times when
the windshield is down.
Be sure
that you carefully follow the instructions
for raising the
windshield. Make sure that the
folding windshield, windshield
wipers, side bars,
and all associated hardware and fasteners
are
correctly and tightly assembled before driving
your
vehicle. Failure to follow these instructions
may prevent your
vehicle from providing you and
your passengers protection in
some accidents.
If you
remove the doors, store them outside the
vehicle. In the event
of an accident, a loose door
may cause personal injury.
Lowering the Windshield and Removing Side Bars
Lower
the fabric top or remove the hard top following
the instructions
in this manual.
Remove the sun visors, if desired. Store the sun visors.
UNDERSTANDING THE FEATURES OF YOUR VEHICLE 105
3.
Remove
the two Torx® head screws
holding each side bar to the windshield
frame. Shift the side bar inboard to clear
windshield pillar molding when removing the side bar.
Do not loosen or remove the adjusting bolts on the side of the side bars. These bolts are set at the factory to properly fit the side bar to the vehicle.
NOTE: Store all of the mounting bolts in their original threaded holes and tighten for safekeeping.
4. Unzip the sport bar padding to expose the side bar bolts. Remove the two front and rear Torx® head screws for each bar. Remove the side bars and rezip sport bar padding in place.
CAUTION!
Do not remove the head impact foam from the side bars, as damage to the foam may result.
106 UNDERSTANDING THE FEATURES OF YOUR VEHICLE
5. To safely store the side bars in your vehicle, use four of the cinch straps, found in the glove box. Attach the straps through the footman loops located in the floor behind the folded rear seat on each side of the vehicle.
6. Remove the windshield wipers by first pulling the wiper away from the windshield and out to the "lock" position. Then, using a small flat tool such as a screw driver, release the retaining clip. Lift the wipers off and store in center console or securely behind the rear seat.
WARNING!
You or others could be injured if you carry the side bars loose in your vehicle. Remove the bars from the vehicle or securely store them as described or they may cause personal injury if an accident occurs. See your authorized dealer for replacement if the cinch straps are not found in the glove box.
UNDERSTANDING THE FEATURES OF YOUR VEHICLE 107
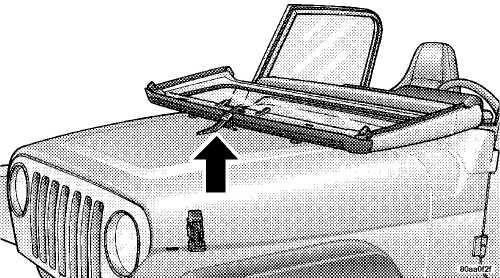
7. Remove the black round headed windshield Torx® 8. Lower the windshield gently until it contacts the head screw on each side of the base of the windshield. rubber hood bumpers.
108 UNDERSTANDING THE FEATURES OF YOUR VEHICLE
9. Secure the windshield by passing the remaining cinch strap, found in the glove box, through the footman hoop on the center of the hood and on the center of the windshield frame. Tighten the strap to secure the windshield in place.
Raising The Windshield And Replacing Side Bars
To raise the windshield, install the windshield wipers, and install the side bars use these same steps in reverse.
WARNING!
To
help protect against personal injury, always install the side
bars when raising the windshield on your vehicle. If you do not
raise the windshield and install the side bars, you lose the
protection these structural elements provide in some accidents.